


The Knapsack
Note: All images used without permission. Original sources are cited at bottom of page.
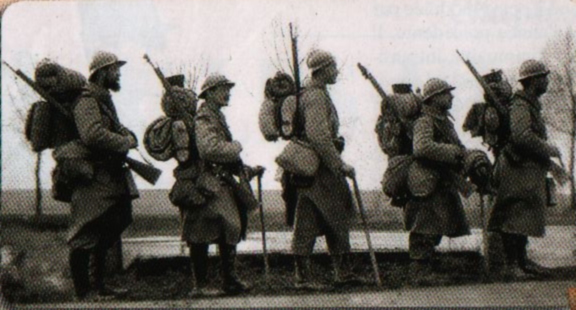
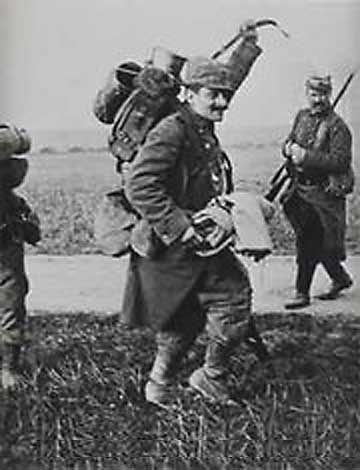
The mainstay of the French infantryman's kit in the war was without a doubt the havresac ("knapsack"), or more simply, le sac. As the trench paper "Le Petit Écho du 18e Territorial" quipped, it was "...to all those who had the fortune of carrying it...the heavyweight champion." Universally detested, it was nonetheless an essential and ubiquitous item that rarely was beyond the reach of the soldier.
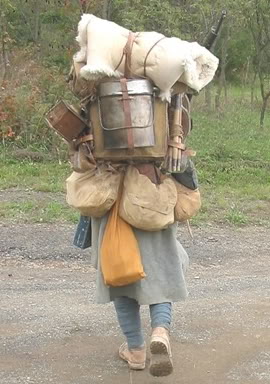
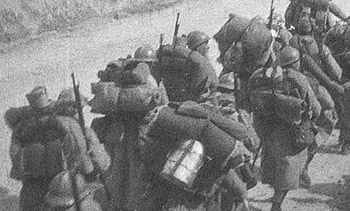
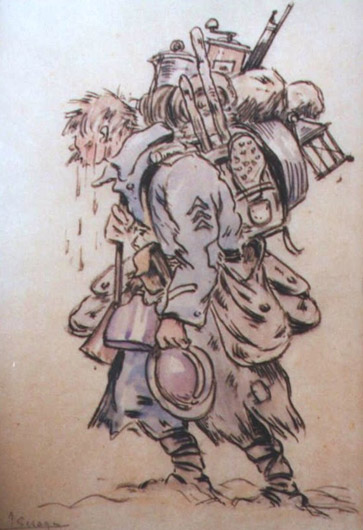 The antiquated design had hardly changed since the days of the Second Empire (1852-1870) and was fitted out with a dizzying array of leather straps and harnesses. When fully loaded, it truly gave the impression of an overloaded peddler's cart. All infantrymen had to shoulder this burden. There was no question of throwing it on baggage trains. Often, during large offensive operations, it was even worn over the top in the attack.
Le sac went by several nicknames including, "Azor" and "As de Carreau." The first of these is the French equivalent to the archetypal dog name "Fido," in reference to the material once used in the production of the sack -- dog skin. The second nickname, "Ace of Diamonds," is a play off the word carreau. Literally, "checker" or "square," it was also the same word used for the suit of diamonds in a deck of cards. The "Ace," of course, represents the top card. The knapsack's weight when fully fitted out was generally in the area of 25 to 30 lbs, though some soldiers testified that it could be as much as 45 lbs. And this, without taking into account the rest of the soldier's kit! (See Weight of the Marching Order Kit page here.)
Knapsack Specs
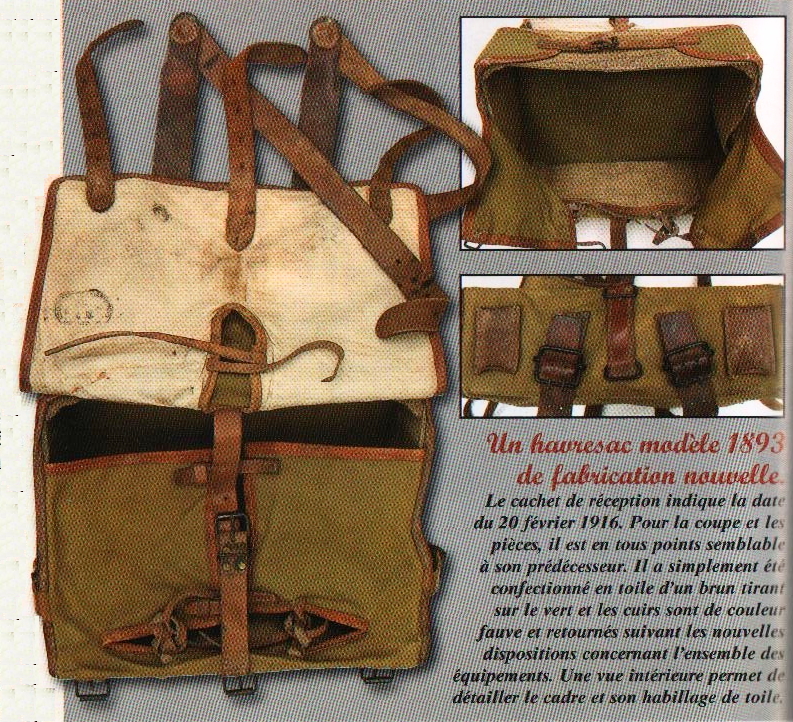
Often referred to as the model 1893/14, the pack was composed of an interior wooden frame covered in an unpainted canvas body (cotton duck, ~18 oz). The color of the cloth varied from beige to tan to a pea green (which quickly faded from exposure to a mustard). The interior wooden frame (32.5 cm wide x 26.5 cm tall) was made of thin planks (8 mm total width). This was enwrapped in cheesecloth for reinforcement. At the top of either side of the pack, attached to the flap, were leather reinforcement caps that featured a raised embossed polygon (the reason for which is a mystery). There were six removable straps that attached to the pack via leather loops and buckles of blackened (Japanned) iron:
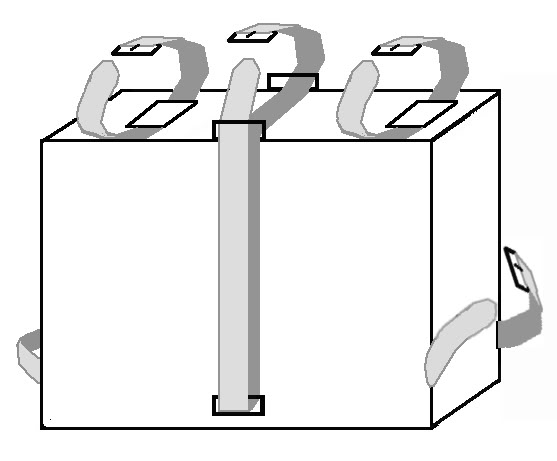
The following diagram shows the manner in which the straps were fed into the loops mounted on the pack. In all cases, the buckle end was to the front (closest to the man). When the strap was buckled, any excess length was rolled into a coil by feeding the strap end backwards (and inverted) through the loop attached beside the buckle and coiling it on itself, smooth side out. Note that the big load strap does not wrap around the entire pack.
The following are specs for the blackened steel buckles used on the pack and the separate external straps.
Knapsack Arrangement
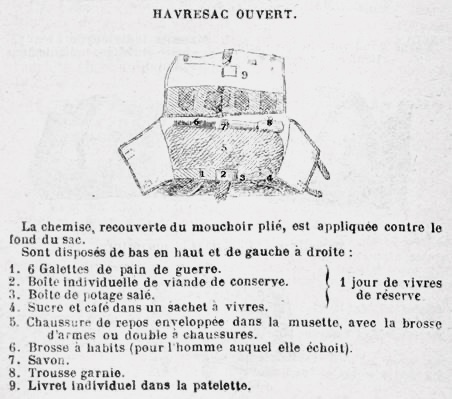
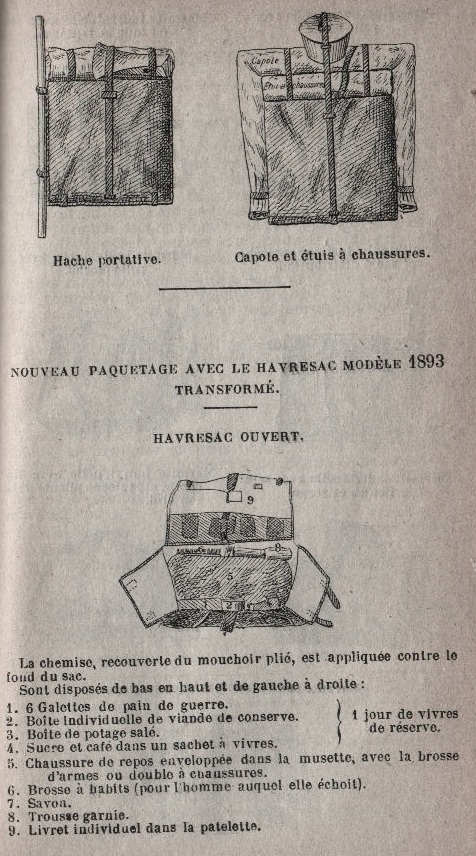
Every amount of the knapsacks space was used. The interior was to be packed in a specific fashion to make use of the limited room. The war-time regulation arrangement was as follows.
Interior of pack:Then the following items placed of top of shirt:
Reserve Rations (2 days) -- (placed along bottom of pack). Includes: 12 hardtack biscuits (in canvas sacks), 1 double-sachet of sugar/coffee, 2 cans preserved meat, 2 cans condensed soup. Police Bonnet Wash-Towel Pair of Extra Socks Sewing Kit Clothing Brush Tent-Stakes (3) Toiletries -- Includes: mirror, razor, shaving brush, soap. Extra Rifle Cartridges -- 10 packets of 8 rounds (when going into an attack).
Notes:
1) in war-time, the cup, spoon, bar of soap, rifle-grease/shoe polish tin, double-sided boot brush and rifle-cleaning brush were to be placed in the second haversack.* The rifle-cleaning kit and cord, and ramrod were carried in the baggage trains.
*There were two sets of brushes (rifle-cleaning brush, double-sided boot brush, clothing brush) distributed per squad.
2) In August 1914, the second haversack was still carried on the pack, strapped to the top with the rest shoes contained inside. The rest shoes were quickly suppressed, and the second haversack was later worn hung over the shoulder.
Beyond the regulation items above, soldiers often carried an extra pair of boots (placed on either side of pack). Optionally, a sheep-skin in cold weather (typically rolled), a lantern or coffee grinder, extra rations, walking stick when not in use, and anything else that couldn't be fit inside the pack or haversacks, all of which were secured with straps or twine.
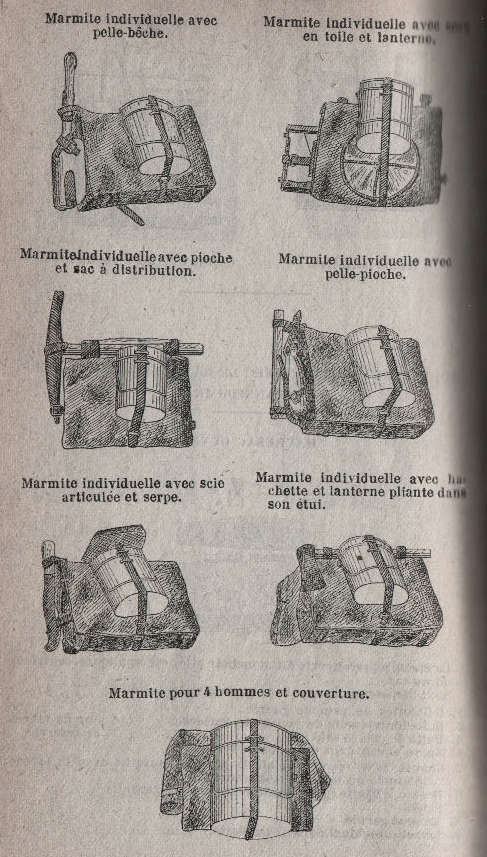
Placement of Portable Entrenchment Tools
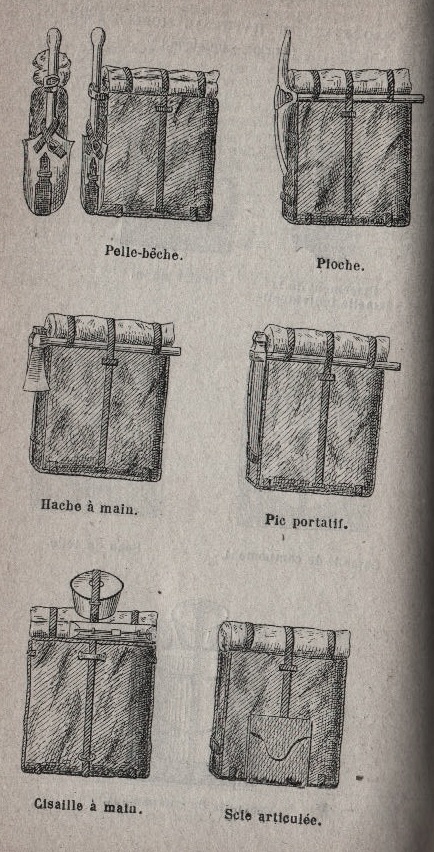
Regulations prescribed just how each of the portable entrenchment tools was to be fixed to the pack. Each soldier was issued at least one of the following: a spade-shovel, spade-pick, round-shovel (model 1916), pick, wire-cutters, articulated saw, billhook, or hatchet (reserved for corporals). (For more info, see the E-tools and Camping Equipment Distribution page here.) Depending on the type, the tool was secured either to the side, top or back of the pack using the appropriate strap.
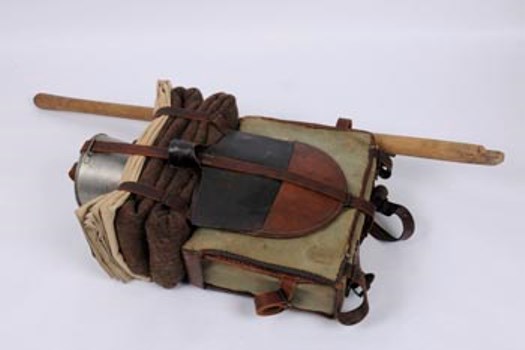
--Shovel-spade: placed on left side of pack, the concavity facing against the pack, handle positioned vertically and maintained upright using the cross strap, which loops around the left greatcoat strap. The side strap secures the tool to the side of the pack passing through the loops on the tool's case.
--Pick-spade: with the metal tool and handle separated, the spade-pick is placed on the left side of the pack, concavity facing against the pack, the pick pointed up toward the top of the pack. The side strap of the pack secures the tool by looping around the body of the tool and the small strap of the tool's case, below the loop. The pick and the top of the handle are maintained upright using the cross strap, which loops around the left greatcoat strap.
--Round shovel M1916: transported with the handle separated from the blade. The handle is carried on the left side of the pack and maintained vertically by the side strap on bottom and the cross strap on top, which loops around the left greatcoat strap (similar to the spade-shovel). The blade is laid flat against the front flap of the pack, secured by the main load strap which passes through the handle hole.
--Pick: with the handle fixed to the tool, the handle placed horizontally along the back top edge of the pack, the pick itself (in its case) running along the left side of the pack for support, the point facing up. The handle is secured using the two greatcoat straps and the big load strap, with the two greatcoat straps looping around the handle, making a full revolution around the handle in order to prevent it from slipping.
--Wire-cutters: placed on the top of the pack, against the baggage, the opening facing out and turned down. It is secured by the left greatcoat strap and the big load strap, which passes through the loops on the case.
--Articulated saw: closed up in its case, placed flat, above the individual mess-kit. Secured by the big load strap, which passes through the loop of the case.
--Billhook: placed flat against the left side of the pack, the back of the blade against the back of the man, the point up. Secured by the side strap of the pack, which passes through the loop of the case, the handle maintained vertically by the cross strap.
--Hatchet: with the handle fixed to the tool, the handle placed horizontally along the back top edge of the pack, the pick itself (in its case) running along the left side of the pack for support, the cutting edge facing down. The handle is secured using the two greatcoat straps and the big load strap, with the two greatcoat straps looping around the handle, making a full revolution around the handle in order to prevent it from slipping.
See the diagrams below illustrating the proper e-tool arrangement.
Placement of Squad Camping Implement
 As with the portable e-tools, regulations prescribed just how each of the squad camping implement (for cooking) was to be fixed to the pack. Each soldier was issued at least one of the following: a camp mess-kit ("dish-for-four"), 'Bouthéon' camp stew-pot ("bottle"), model 1881 collapsible canvas bucket ("water-cow"), canvas distribution sack, 'Montjardet' model 1910 lantern (carried by corporals), or the 'Keppler' model 1896 coffee grinder. (For more info, see the E-tools and Camping Equipment Distribution page here.)
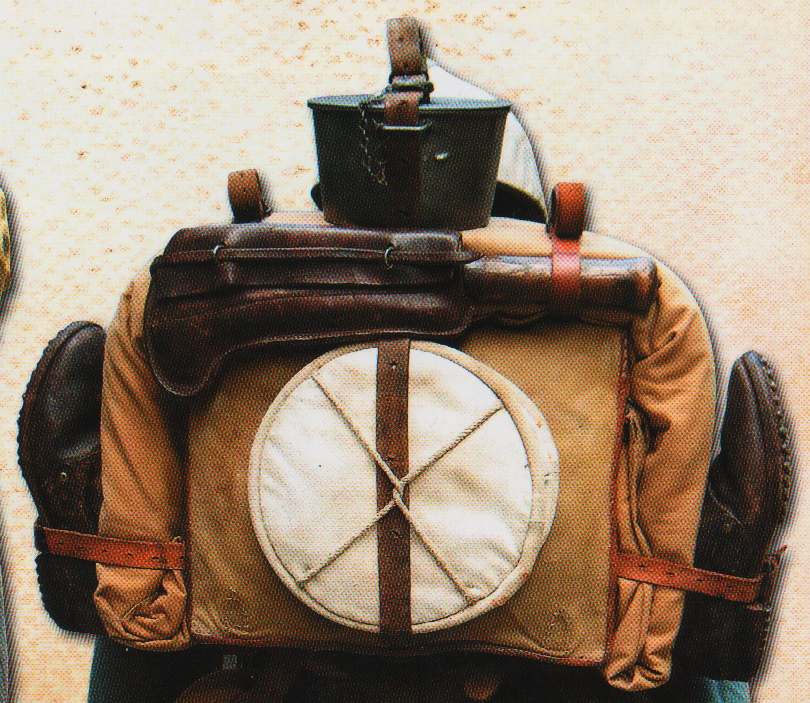
--Camp mess-kit: placed on the back of the back, concavity facing in. Secured using the big load strap, which passed through the handles of the mess-kit.
--Camp stew-pot: placed on the back of the back, lid facing up, concavity facing in. Secured using the big load strap, which passed through the loops on the body and lid of the stew-pot.
--Canvas bucket: placed flat, on the back of the pack below the individual mess-kit, bottom facing out. Secured by the big load strap, which passes under the cords located on the bottom of the bucket.
--Distribution sack: folded in two width-wise and in twelve length-wise, placed flat on top of the pack. Secured by the two greatcoat straps and the big load strap.
--Montjardet lantern: closed up in its case, placed flat, on the back of the pack below the individual mess-kit. Secured by the big load strap, which passes through the loops of the case.
--Keppler coffee-grinder: placed in the individual mess-kit, the lid facing down.
See the diagrams below illustrating the proper e-tool arrangement.
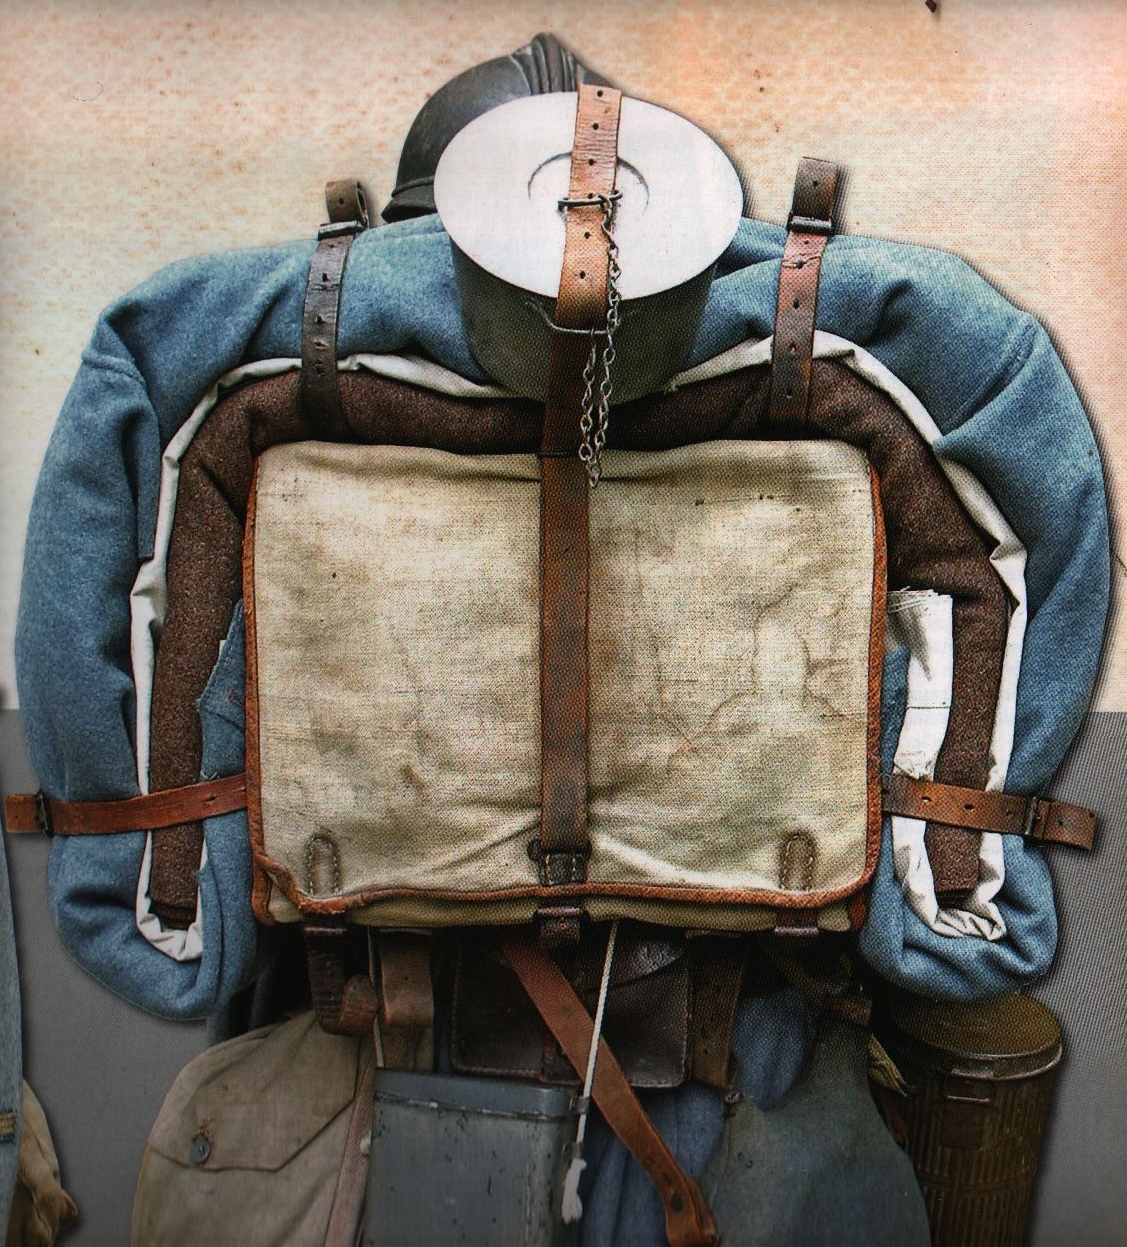
Informal Knapsack Arrangements
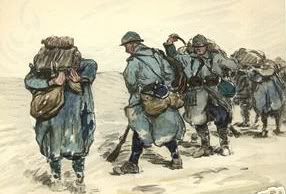
As any student of history knows, regs are regs and often soldiers don't follow them. While soldiers would have certainly followed the regulations on knapsack arrangement for formal occasions such as formations and parades, in the field they would have arranged their packs according to individual preference or convenience. The blanket, often rolled inside the tent canvas, was arranged in various fashions. It could either be made into a short roll and placed on the top of the pack or, in the style of the Colonial and Zouave troops, be folded like an accordion and placed on the top. The tent canvas itself would either be folded to the same width of the short blanket roll and then wrapped around the blanket, or it could be kept at it's full length with the blanket rolled inside. With this method, the roll is placed on top of the pack with the empty ends of the tent canvas being strapped down on the sides of the pack. Written and photographic evidence (particularly evident when a short roll was made) suggest that an optional second blanket was rolled inside the first. Alternatively, the jacket or knitted woolen garment could be placed inside the roll.
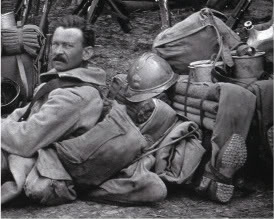 If the tent canvas wasn't rolled around the blanket it was folded and placed under or on top of the blanket. Tent poles and stakes were often placed on the top or sides of the pack. And E-tools such as the wire-cutters or billhook were often placed on either side or the top, though the spade-shovel was typically always left on the side. In part due to their shape, camping implements could only be arranged as per the regs. The individual mess-kit was nearly always seen on the top of the pack. As noted above, any other item that couldn't otherwise fit in the pack was attached as conveniently as possible you straps or twine.
For reference, see the pictures below as well as the Original Photos and Artwork in the Images section.
Putting On the Knapsack
While at first it may seem trivial to provide a description of how to actually put on the knapsack, anyone who has had first-hand experience will know this is no easy task. With the command "Sac au dos" the men did their best to put the awkward packs on their back. The typical method was to leave one shoulder strap fixed and the other one undone. Usually the right strap was left undone. The soldier lifted the pack and slid his left arm through the left shoulder strap, then grasped the end of the right shoulder strap and pulled upward to drag the right side of the pack up to his shoulder. Holding the strap tightly to maintain the pack at the shoulder, the soldier then leaned forward and pulled the shoulder strap down and behind him, bringing the end of the strap to the right buckle. Finally, he ran the strap through the buckle and fixed it at the desired length. With a particularly heavy load, the man often turned to his neighbor for assistance in lifting the pack and buckling the right shoulder strap. If a comrade wasn't in sight, the soldier could also lean against a tree to suspend the pack.
Note that some items shown in diagrams were no longer in use during the war, e.g. grand bidon
(Click for larger images)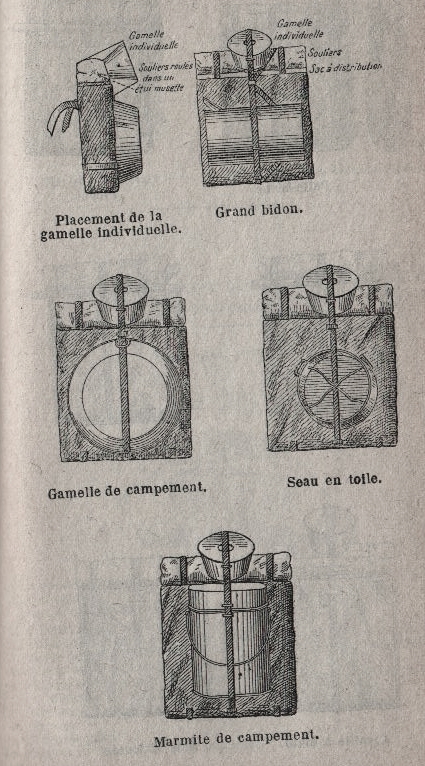

Sources:
Livre du Gradé d'Infanterie ("Infantry NCO's Book") dated October 1915.
"L'Uniforme du Poilu." Gazette des Uniformes, Hors Serie no. 19. by G. Bernard and F. Lachaux, 2008.
"L'Equipement du Poilu" Gazette des Uniformes, Hors Serie no. 19. by G. Bernard and F. Lachaux, 2008.
"1916, Le Poilu de Verdun." Militaria Magazine no. 39 (Nov. 1998) by P. Bouchery and F. Vauvillier.
The French Army in the First World War 1914-1918 (vol. 2) by Laurent Mirouze and Stéphane Dekerle. Verlag Militaria: Vienna, 2008.

